Search This Blog

.

.

hell is empty. all the devils are here.... shakespeare

hell is empty. all the devils are here.... shakespeare

Tuesday, December 27, 2011

whats on my table..... burned metal...

So I decided to give metalsmithing a try. I took a class from Stephanie Lee. She is an artist I truly admire. Her class was very straight forward and I learned a lot. I have to admit that I was very intimidated by the micro torch at first... so this was a big challenge for me; still now I am concerned of how to keep it safe at home now that it is filled with butane gas. The torch I bought doesn't have a lock, only an open and close gas knob... this disturbs me greatly because I fear the knob might turn accidentally... on its own... and the fumes will kill us... I know I am exaggerating but being a novice, I really don't know what to expect and I originally didn't exactly know what to look for when shopping for a torch.Moving on, here are my very first soldered bezels. They are still unfinished, I haven't bought a patina yet and I still haven't a clue on what to fill them with but here they are. Some of the bezel ideas I took from a class I haven't taken yet, but I plan to as soon as my budget frees up: the Towers and Turrets class by Sharon Tomlinson. I don't want to violate her copyrights and I wanted to give her credit. She is also another artist I admire much.


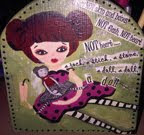
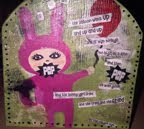
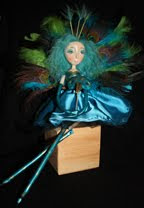
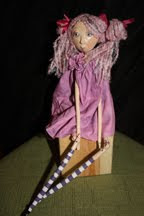
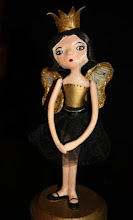
On a side note, I do want to make more art dolls. I have started on some and they now sit on my table as you can see. This Christmas I gave some of my dolls new homes and it was hard to part with them but I have to share my passion with others who appreciate and admire it. I can't hoard everything I make right!!???

I wish you all the best Christmas (late) and New Years! May your new year be full of new creations, ideas and filled with happiness shared with the ones you love.

Xoxo
Ziggy


Sunday, November 6, 2011

altered jewelrybox and birdhouse

Well.... its been a while since I had time to sit and blog. Life is busy.... So I picked up some plain wooden birdcages and some paper mache boxes  from Hobby Lobby a while back and I finally had a chance to do something with them. I used a very beautiful napkin that I won on the OWOH event for the birdcage and I recently was gifted some items in a very beautiful cupcake gift bag. The moment I received the gift I was very much impressed with the bag, honestly I loved the bag  more than the gift, although the gift was lovely too. But, being the creative being that I am my mind immediately started devising ideas on what I could do with this bag. My teen loves cupcakes so as soon as I got home I decided to make her a box. I cut out the bag and modge podged it to the box, then I made the cupcake on the top out of Femo clay and; as I was on a roll, I also made her some little cupcake pendants and earrings that I forgot to take pics of. Once I started it was hard to stop and I stayed late that evening decorating the birdhouse too. I was very surprised to see how well Wacky Tacky glue works with wood and clay and even the ribbon. I used Modge Podge on the lace. It was fun to see these come to life after sitting on my work table for months. Sometimes it just takes one little found object, as meaningless as it may be to others, but to the artsy folks like myself, that's what it takes to create greatness.... and I really loved these and so did my girl.... cheers all!!

xoxo
Ziggy


Thursday, October 13, 2011

Day of The Dead skull earings, Steampunk necklaces and lots of new stuff !....

Well not lots, but a lot more than usual. As always to busy too post, too busy too create and work and the kids and life always keeps me occupied with little time to work on my craft. I always sneak in a little time, though, as hard as it is, and this is what I have today!!!! Please visit my Etsy shop for more detailed pictures!!!! Thanks for visiting!!!

xoxo
Ziggy


Wednesday, August 10, 2011

new etsy items, beaded keychains....

My mom an artist like me... she made some of these and tought me how to make them... how cool is she??

Thanks for visiting!

xoxo
ziggy

Monday, August 8, 2011

steampunk heart necklace and new teacups

So I gave the steampunk a try.... I used sculpey III and fimo I think... femo? Anyway, this is what I came up with, it has a small window filled with resin, inside are small watch parts.

I also wanted to share my new teacups... from ebay... I love them! I am building a china hutch in my breakfast area, I cant wait to put these up....!


Sunday, July 31, 2011

Rock stars and hollywood legends table collage

This was an Ikea table once... we all know how "fragile" Ikea furniture is right???? My husband tripped over it and broke it one day so know its hanging on the wall. These are all my favorite musicians and actors/actresses of the oldschool, of course I missed a few... Rolling Stones, Zeppelin... Its a lot of images of famous or "infamous" rock and Hollywood legends glued and modge podged to the wooden top.

my one and only painted shabby desk...

Who knew how much work and effort goes forth into refinishing furniture!.... I've seen so many lovely peices of furniture with a very high $$$ price tag... I never want to pay the price... I think I can wing anything and then in the middle of it all, I'm bawling and I  just want to quit! But I don't. My daughter painted her room and we got some new vintage furniture so we needed a smaller desk. We were over our budget already so I had to take on the challenge and get a cheap one and revamp it.This one was a regular brown  roll-top desk. I forgot to take a before pic, but you know them... it looks something like the the one I am posting here. The "after" was a lot of work, after sanding, priming, sawing screws in half (the crystal knobs I bought came very long...) I finally ended up with this.... Its a little distressed, it looks a lot better in real life though. It still needs some final details and I'm debating on the drawer at the bottom... I might go all cream. If you read this post... PLEASE ADVISE....

Now I understand the high price tags on repainted furniture. I don't know if I will be doing it again... at the end... my daughter loved it.... so I was delighted.

before


after


Thursday, May 19, 2011

2nd attempt, tree of life pendant and dream catcher

Much better! Yes practice makes perfect! Not perfect, as anything handmade, but I am very content with my end result. Now back to doll making....

xoxo,
Ziggy
The Legend of the Dreamcatcher
Long ago when the world was young an old Lakota spiritual leader was on a high mountain and had a vision. In this vision, Iktomi, the great trickster and teacher of wisdom, appeared in the form of a spider. Iktomi the spider picked up the elder's willow hoop which had feathers, horsehair, beads and offerings on it, and began to spin a web. He spoke to the elder about the cycles of life; how we begin our lives as infants, move on through childhood and onto adulthood. Finally, we go to the old age where we must be taken care of as infants, completing the cycle. "But," Iktomi said as he continued to spin his web, "in each time of life there are many forces; some good and some bad. If you listen to the good forces, they will steer you in the right direction. But, if you listen to the bad forces, they'll steer you in the wrong direction, and may hurt you. So these forces can help or can interfere with the harmony of Nature."
While the spider spoke, he continued to weave his web. When Iktomi finished speaking, he gave the elder the web and said, "the web is a perfect circle with a hole in the center. Use the web to help your people reach their goals, make good use of their ideas, dreams and visions. If you believe in the Great Spirit, the web will catch your good ideas and the bad ones will go through the hole."
The elder passed on his vision to the people, and now many Indian people hang a dream catcher above their bed to sift their dreams and visions. The good is captured in the web of life and carried with the people, but the evil in their dreams drops through the hole in the center of the web and are no longer a part of their lives.


how to make a dreamcatcher:  http://www.craftsforkids.com/projects/dream_catchers.htm 

Tuesday, May 17, 2011

First attempt at Tree of Life Pendant

I am very disapointed, its not what I envisioned... My first attemt at a wire tree pendant and it completely sucks! I was very disapointed. But I shall not desist. I will give it another try, they say practice makes perferct, right!? I wiill post my 2nd attempt tonight. I never thought jewelry making could be so dificult, especially since my hands hurt often, I feel like I have carputonal. My hands even hurt when I straighten my hair! But I love jewelry making even though I'm a novice. I know I will get a lot better! At least know where my flaws are on this one, where to begin... lets see... the stones are too big, my coiling needs to be tighter, I forgot to show some roots....  Lets see how it goes tonight!

Thursday, May 5, 2011

Etsy Shop open!

Please visit my etsy shop!!!! I have new stuff listed!

Monday, April 4, 2011

And since I'm blogging... more jewelry to share!!!! Bird Nests for Spring!!!


revisited- resin filled bottle caps, favorite women of art in resin!!!

Its been such a long time!!! I was able to escape a bit from my vida loca, my crazy life!!! Always so much to do and never ever enough time! So many projects left unfinished... but I'm getting close to finishing them, one day at a time!  So I learned the hard way, that if you aren't 100% accurate in mixing your epoxy resin solution, they will probably not cure .... ever, so I had to give it another go... I don't even know where I left the other ones, but I had to scrape the resin out and refill them. I will post those later.


This is my favorite: "Well behaved women rarely make history." with a famous, or should I say infamous painting  of Gabrielle and her sister.
My favorite women in art!
Frida
Venus
Mona Lisa
and the Corn Poppy (who is this chick by the way???) Need to google her...

Saturday, February 26, 2011

Doll Town marketplace! Buy my dolls here!

Grand Opening! Visit http://dolltown.ning.com/ hosted by Jane DesRosier. Of course she would come up with this amazing idea! Doll Town sprung out of the well-known Cloth and Clay Doll Group...a group of hundreds of international doll makers who have been making dolls together, sharing tips and techniques, and supporting one another in our doll making journey for several years now.

I will be selling my dolls here so please come by and visit!!! There are so many awesome artists here, you will not be dissapointed!

Monday, February 21, 2011

my little mexico, paper mache catrina, a year later and still no progress... boo!

This is May of 2010, made of newspapers and wheat paste, some elmers glue too. still in progress...


This is now.... I kept three of the Mexican bottles from the shower and placed them next to her, this is the little part of Mexico that I have in my home, some loterias, an ashtray bought in a trip to the pyramids, and now the bling bottles. I guess, Sally doesn't belong. I will find her another place at home.... on a side note, if anyone wants to try paper mache, mix half part water and half part glue into a container. Tear strips of newspaper and add layers to your basic shape made of , yes, newspaper! and masking tape to keep it together and make your basic form, then mold it with the layers of paper strips. Add 2 to 3 layers at a time and wait for it to dry then add more. Its very simple but messy and drys hard like paper clay, even harder I think. Fun project for the kids!!!

blue fairy ornament give away!!! A second chance!

If you wanted the blue fairy on the OWOH giveaway heres another chance to win it!!!! Just leave a comment. More chances of winning this time since fewer people will comment! I wanted to pick a second winner for the OWOH giveaway, but being that mostly everyone that commented was interested in the pink bunny I want to make sure my blue fairy went somewhere where she is really wanted and appreciated!!! My pink bunny ornament is going to Canada!!! Woo, I love Canada, can I come with? Lol! Anyway, winner will be chosen two weeks from today!!!! Good luck!!!!

bird nest ring and charm, some wired jewelry and industrial chic charms

some jewelry, the wired charms, nest ring and bird nest charm I made and wrapped myself... still learning, others just put them together, some charms from Industrial Chic, I love her jewelry, but I cannot compare. These were me just having fun.... still accumulating stuff... looking forward to opening my etsy store.... need to work on the pics though.... comments, suggestions appreciated!!!!


Thursday, February 17, 2011

*•.¸★♥★¸.•*´*★*´*•.¸★♥★¸.•*´drumroll please..... *•.¸★♥★¸.•*´*★*´*•.¸★♥★¸.•*´

This was truly a great experience! I found so many lovely blogs and so many lovely blogs found me! But now, the winner of my giveaway is..... #45, I will verify that everything is accurate (no duplicate comments, etc.) and notify the winner. Thanks to all for your lovely comments!

And #45 is Lesley from Harmony Road Studio. Congrats Lesley. Please send me your address and I will ship this out this weekend.

xoxo ziggy

Tuesday, February 15, 2011

DIY hand dyed and crinkled ribbon

So I had this pink ribbon, and it was just so boring... I was working on some jewelry, like I said; I'm a jack of all trades, so I dabble a bit into jewelry making. I wanted to embellish a piece that I am working on with ribbon, but what I had, well... it just sucked. I wanted a more distressed, vintage look, so I checked out etsy and it turns out that I didn’t want to pay x amount of money for something I already had at home... or... could make at home, right, isn't that how we crafters always think? Lol. so, I said, hey, it can't be that hard! I decided to use whatever I stumbled upon and put it to good use ... food coloring and antiquing paint. I basically just poured a drop of blue dye onto a paper plate ... brushed a bit here and there on the pink ribbon, blue and red make purple, hence the color I ended with. I used my fingers to blend it, bad idea, duh! (use gloves if you attempt this. I had blue fingers for almost two days!)  I also used blue dye on a white ribbon and finished them by adding a bit of antiquing paint on it, then I razored the edges with an exacto knife to give it a distressed look. I crinkled them into a ball, tied them with a rubber band and trash ties (again, what I found at first hand) and let it rest overnight. I did test it the next day to see how the coloring would hold up and I think it will be ok for the use it will have....  I dipped it in a cup of water and the water hardly turned blue, so I'm keeping my fingers crossed! Unless its pouring rain, it will suffice for now, otherwise I will end up with a purple neck. Lol. I will buy some fabric dye or spray mist for this project on my next trip to the hobby store. For now I am content. I also looked on you tube and you can actually use sharpies for this??? Just as long as you don't sharpie your eyebrows paisanas... lol (mexican inside joke) Anyhow, If anyone has any ideas or advise please share!!!
before:


ball of ribbon.